Don't Wait!


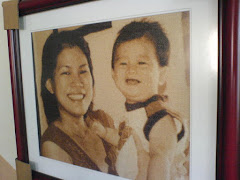
Ramadan, Thanksgiving, Christmas is near!!!!! Celebrate it and give special present for your love one-----Order PHOTO CROSS STITCH now*** You’ll memorize this year celebration with a special picture hanging on your wall or covering your pillow…

Lebaran, Thanksgiving, Natal sudah dekat!!!!! Rayakan dengan hadiah istimewa untuk yang anda kasihi----- Pesanlah KRISTIK FOTO sekarang juga*** Anda akan mengingat perayaan tahun ini dengan foto spesial tergantung di dinding atau menutupi bantal anda...

Showing posts with label basic. Show all posts

Monday, September 15, 2008

Basic Lesson How to Make Cross Stitch


CROSS STITCH - INDIVIDUAL
An individual cross stitch is worked in the same sequence as a
row of cross stitch. Bring the needle out at 1 and insert at 2,
completing half the cross stitch. Then, bring it out at 3, directly
below 2 and insert the needle at 4, above 1. Your individual cross
stitch is complete.


CROSS STITCH - ROW
Bring the needle out at 1, insert at 2 and out again at 3. Continue
this process until the desired number of stitches is completed for
that row.
At the end of the row, work back, bringing the needle out at 4,
inserting at 5 and out again at 6.


FINISHING OFF
To finish off your thread run the needle through the back of four
or five stitches and trim the thread close to the cloth.
Should work become soiled, handwash in cold water with mild
soap. Rinse well and dry flat in shade. Do not wring. Press from
the back with a warm iron.


source: www.stitchcraft.info

Saturday, September 13, 2008

9 How to Improve Your Stitching Experiences

Follow these "rules" and you will avoid mistakes and heart break.

1: Don’t put your dirty paws on the stitchery! Keep your hands clean.
First and foremost, always make sure to have clean hands when stitching. Oils from your skin transfer easily to Cross Stitch fabric and over time create stains that are not easy to remove. The best way to avoid this is to avoid the problem in the first place. (Train your family not to touch your projects unless they have freshly cleaned hands. Better yet - tell them to keep of the fabric and floss!)

2: Don’t stray from the path – Stitches should face the same direction.
Cross Stitch is a fairly flexible embroidery style. There are not a lot of hard and fast rules. It is imperative, however, that all stitches face the same direction, unless otherwise specified in the instructions for the project. Choose a direction for the first leg of the cross stitch and stick with it. I personally am a "righty" - all my bottom half stitches point to the right. It does not matter which direction you choose, just maintain consistency.

3: Stitches are like porridge – They should be just right.
Consistent tension is crucial for creating proper stitches. They should be flat against the fabric, not too tight, not too loose. Experiment on scrap fabric until you learn how tightly you need to pull the floss to create a perfect stitch.

4: Let it all hang out – avoid knots by dangling floss.
As you stitch cross stitches, the floss tends to twist and eventually knot. The simple solution is to frequently dangle the needle and floss allowing it to untwist. Once you get into a routine, you will do this without thinking. Until you do, consciously take this step every few stitches.

5: Let the light shine – on your pattern, floss, and projects.
Good lighting makes or breaks a Cross Stitch project. Proper lighting prevents floss color confusion. Adequate lighting prevents improper stitch placement. It also makes the chart much easier to read. Light sources do not have to be expensive. I use a bright florescent bulb in a regular floor lamp with an adjustable arm. I also carry an inexpensive book light with me to attach to my hoop if I want to stitch in a waiting room or other place where the lighting is not as bright.

6: Sit up straight – Find the proper seating and stick with it.
Set up your main stitching station so that you are comfortable and avoid injury. If you don't have the luxury of a specific place to stitch, chose your perch carefully. Don't sit in an awkward position. Your seating should allow you to work freely, with your arms in a natural stitching position.

7: Take a break – Don’t strain your hands or eyes.
It is tempting to stitch for hours at a time, especially when you can make the time and when you get in the "stitching zone". It is important to avoid this temptation, especially when you are a new stitcher. Taking breaks helps to prevent repetitive stress injuries and eyestrain. Stop stitching, get up, stretch, rest your eyes and hands for a moment, and then start again if you like. If you have trouble with "getting in the the zone" and forgetting to take breaks, use a timer. Or use the TV schedule or musical selections. When the buzzer, show or CD stops, it is time for a break!

8: Slow Down! – Take your time to get it right.
Some stitchers are amazingly fast. I am not always one of them. I have to take my time to avoid mistakes. My progress may be excruciatingly slow, but I would rather take my time and get it right the first time than spend hours removing misplaced stitches. It is very important to work slowly when you try new techniques or stitching fibers such as metallic flosses. Cross Stitch is not a race!

9: Don’t skimp on supplies! Buy the best you can afford.
When choosing supplies, purchase the best you can afford. Everything you choose does not have to be the most expensive, high-end model, but there are some supplies you should not skimp on. Floss and fabrics should be good quality, especially as you start to work on larger projects. Good scissors for cutting fabric and flosses are a must. Cross Stitch does not have to be an expensive hobby, but if you are investing your time in creating an heirloom sampler, you will want to be sure that the supplies are of a quality that corresponds to your effort.

source: crossstitch.about.com

Thursday, September 11, 2008

A Very Basic Tips....

GETTING STARTED

Always start stitching from the center of your fabric. To find the center on your fabric, fold the fabric in half twice. The center will be at the intersection of the two folds.
Finding the center of your chart by following the two arrows. One arrow will be in the top center and the other one in the middle left side of your chart. Follow these two arrows. Where they meet is your center stitch.


FABRIC

Put tissue paper in your hoop with your fabric then tear away the center where you are stitching. This will keep oils from getting onto your fabric and help your hands from being moist.
Use different qualities of fabric. Try cheaper fabric for quick designs, saving money so that you can splash out on the best fabric for heirloom projects.
You will want to allow 3 to 4 inches of fabric on each side of the design. This will help you framing your project easily.


THREADS

When stitching with 2 threads use only one strand of floss, put the ends together and thread them through the needle leaving a loop on one end. When you put the needle through on your second stitch, catch it through the loop. This keeps the material from getting bumby.
When ending your thread by running under other stitches, try to match colors. Never run a dark color under light stitched, it might show through to the front.
Back stitch should be added when all other stitching has been completed.


NEEDLES

Many of us we have the bad habit of leaving the needle into the fabric when we end a session. Be aware that this can leave a permanent stain or large hole in your fabric. Always store a needle properly.


GENERAL TIPS

If you have pets or small children do not keep your cross stitch materials in a bag. Keeping your threads, needles and scissors in a box that shuts securely will prevent little fingers and paws from getting into things easily!
If you are working on a larger needlework project, invest in a set of stretcher bars. They keep the fabric from getting warped and it makes it easier to actually do the sewing. They come in several sizes, and are fairly inexpensive.
Using a highlighter in a light color - yellow works very well for marking off stitches or areas of stitching as you complete them. If your lighting make the yellow hard to see at night, you could use another color like green or blue or orange when stitching at night.

source: yiotas-xstitch.com

Wednesday, September 10, 2008

How To Wash Cross Stitch

* Use only cold water for the wash and rinse. Tap water is fine unless you have very hard water, then you will want to use distilled water. Make sure the sink and any containers you will use are clean.

* Pre-rinse the piece under cold, running water.

* Place in a soapy cold water and gently wash. Do not scrub. For detergent I recommend Yarn Trees FabriCare, but other products are available. Avoid soaps that have additives such as fragrances, softeners, etc. Use only a small amount of detergent.

* If needed, rinse and wash a second time. DO NOT WRING the water out; this is not necessary and can pull the stitches.

* Rinse three times in cold water.

* As you work, check carefully for any sign of color bleeding, hoop marks or other stains.

* Remove the piece from the final rinse. Let the water drain out of the fabric, but DO NOT WRING.

* Place the cross stitch on a dry bath towel, and roll up the towel (with the cross stitch still on the towel).

* Unroll the towel and repeat on a dry section of the towel (or another towel). Gently pressing on the rolled up towel will remove all the water you need to remove. Repeat as necessary.

* Unroll the towel. Lay the cross stitch face up on a dry section of the towel. If necessary, let the piece air dry until it is just damp but not dripping wet.

* Once again, check for any stains or marks. Once you iron the piece, it will be even more difficult to remove any stains.

* Place the cross stitch face down on a dry bath towel. Use an iron set to a low or medium temperature and lightly press the back of the cross stitch. If you have beads, special threads, etc you want to be extra careful with this step. Keep the iron constantly moving. If you have not used that iron in a while, practice on a scrap piece of cross stitch fabric. Make sure the steam setting is off, and the iron is not spitting steam. For the temperature setting, keep in mind the types of materials you used in the cross stitch, if there is any question, use a lower temperature.

* The cross stitch will still be slightly damp. Lay it face up on the towel and allow to air dry.

source: Yarntree.com

Friday, September 5, 2008

Determining the Width and Height of Your Design Area in Inches

Divide the number of symbol squares in the width of your design chart (literally count the number of symbol squares across the widest point of the chart, do not count the squares that are outside of the design) by the count of your fabric (the number of threads per inch). This will equal the width of your finished design area in inches.

Then divide the number of symbol squares in the height of your design chart by the count of your fabric. This will equal the height of your finished design in inches.

Example:

If you have a chart that is 28 squares high and 42 squares wide and you are going to embroider the design onto 14 count Aida, the formula would be:

28 squares ÷ 14 count = 2 inches high

42 squares ÷ 14 count = 3 inches wide

You will need to use this formula to determine how much fabric to buy if you change the count of the fabric recommended in the pattern instructions, or if there is no fabric count indicated. Just remember to add enough fabric to all sides of your design area for finishing, usually 4 to 6 inches to each edge.

There are a variety of symbols which appear in the squares of the chart. These symbols are keyed to a color chart and tell you what color floss to use. The written instructions tell you what stitch to use. A symbol, usually an arrow, will indicate where the center of the chart is located. It is from this center point that you begin to count out your design. If no such point is indicated, follow the guidelines below.

source: www.caron-net.com

Wednesday, September 3, 2008

How To Cross


A cross stitch consists of 2 diagonal stitches which together form an x, or cross. There are various ways you can do this, but you must be consistent about the direction of the stitches. If you start making a / and cover it with a \, all the stitches must have the upper stitch going \.

We suggest you stitch left to right. Come up at the lower left corner of the first stitch, then go down at the upper right, to make a /. Come up at the lower right and go down at the upper left, and that makes one cross.

If you have several stitches in a row, you can make all the / stitches across the row first, and then work back making the \ stitches. On the back, your stitching looks like this: |||||. (This is called Danish method.) You may prefer, at least in some situations, to complete each cross as you go. (This is called English method.) When you do that, the back looks like this: |/|/|/| You will definitely want to complete each cross as you go when stitching a vertical column - don’t go down the column making /s and then go back up with the \s! English method stitches are said to be sturdier -- this might be a consideration if your stitching will be used as a pillow cover or something that doesn’t just hang on the wall. The English method does use slightly more floss than Danish method (about 8% more).

You may prefer to start your crosses at some other corner - that’s fine - just pick a way and always do it the same way.

source: www.scarletquince.com